GRAVÜR DÜNYASI
Digital Engraving Library
| Engraver | William Johnston (1802-1888) - Alexander Keith Johnston (1804-1871) |
| Date | 1856 |
| Technique | Steel Engraving (Text on Reverse) |
| Category | Maps |
| Source | Pictorial History Of The Russian War 1854-5-6 - W.R.Chambers London & Edinburgh |
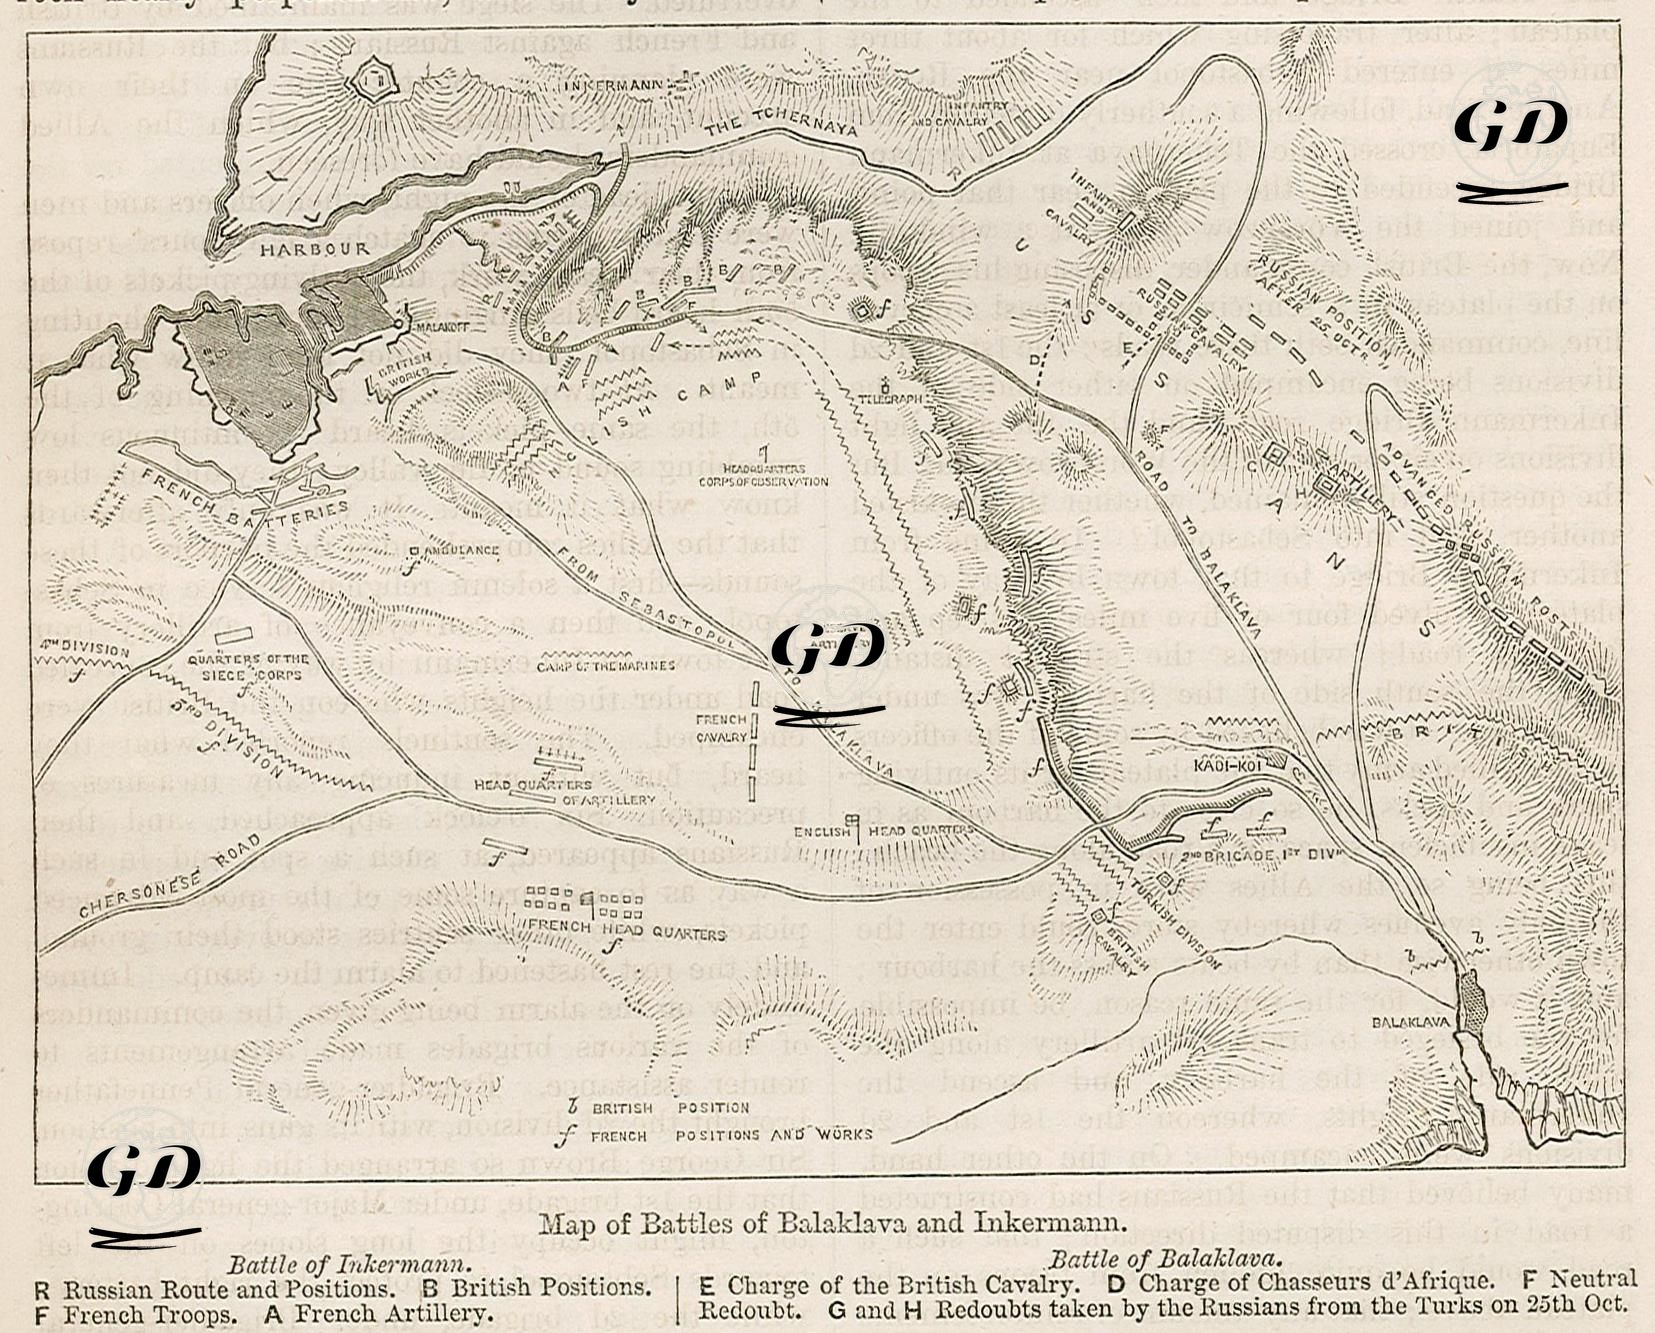
This map presents the Battles of Balaklava (October 25, 1854) and Inkerman (November 5, 1854), which took place during the Crimean War and affected the fate of the war, by combining their geographical, tactical and strategic order and battle plans in the same scene. The map shows the positions of the British, French and Russian troops, their battle lines and military base areas in detail. The Battle of Balaklava on the map; In the early morning hours of October 25, 1854, Russian forces (R) advanced from the east (right) and attacked and quickly captured the G and H fortifications where the Ottoman troops were located. These fortifications are marked on the map with the words "taken by the Russians". Upon this development, the British commander, Lord Raglan, directed the light cavalry (Light Brigade) to attack the Russians. However, the order was misinterpreted and the cavalry advanced directly into the line of fire of the Russian artillery. The "Charge of the British Cavalry (E)" line on the map shows the direction of this iconic and tragic attack. At the same time, French forces advanced along the road marked Charge of Chasseurs d’Afrique (D), supporting the British forces and pushing back some Russian positions. As a result of this attack, the Russians gained a tactical advantage militarily, but they could not achieve their strategic goals. The Battle of Inkerman on the map took place in the northeast of the map, near Inkerman, among the hills and valleys. The Tchernaya River and hilly areas in particular are the central scene of the battle. On the foggy morning of November 5, 1854, the Russian forces (R) launched a sudden raid on the British positions (B) from the east. The “Russian Route and Positions” line on the map shows this sudden advance. The battle was fought on steep slopes and narrow passes. The British resisted despite their small numbers. The areas shown as “British Positions” and “English Head Quarters” on the map are the main defensive points. The French forces (F) intervened from the French Batteries line in the west of the map and supported the British. As a result of the fierce fighting, the Russians were forced to retreat with heavy losses.